The guide is designed to be brief and yet covering all needed steps on how to enable the 3D Stereo Plugin for Ansys. The moreStereo3D Plugin has been certified for Ansys version 14.5 yet all other Ansys versions are expected to work. This is a one-time setup and not needed to be repeated once setup properly.

Download the moreStereo3D 3D Stereo plugin here.
I. Prepare the 3D Stereo Plugin
1) Please install moreStereo3D.
2) Start moreStereo3D.
II. Configure the 3D Stereo Plugin for Ansys
3) Right click the moreStereo3D Tray Icon (next to your system time) and select “more3D Stereo Enabler”
4) Click the “Locate known Apps” Button. The more3D stereo enabler will search the folders “C:\Program Files” and “C:\Program Files (x86)” for your Ansys installation and you can apply the 3D Stereo Plugin for Ansys.
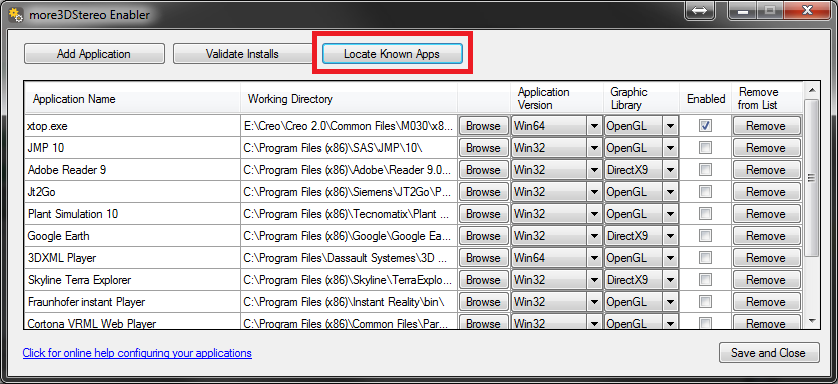
In case you have installed Ansys into a non-standard installation directory, please continue with step 5). If the more3D Stereo Enabler found your Ansys installation properly, please continue on step 8)
5) Click the “Add Application” Button.
6) Navigate to your Ansys directory. The folder might look close to this:
“E:\Program Files\Ansys Inc\v140\bin\winx64”
7) Select the file “Ansys.exe” and press “Open”.
8a) Please set “Application Version” to “Win32” for a 32-Bit Version of Ansys. Set “Graphic Library” to “OpenGL” and check the “Enabled”-Checkbox. Press “Save and Close”.
8b) Please set “Application Version” to “Win64” for a 64-Bit Version of Ansys. Set “Graphic Library” to “OpenGL” and check the “Enabled”-Checkbox. Press “Save and Close”.

III. Configure and launch Ansys
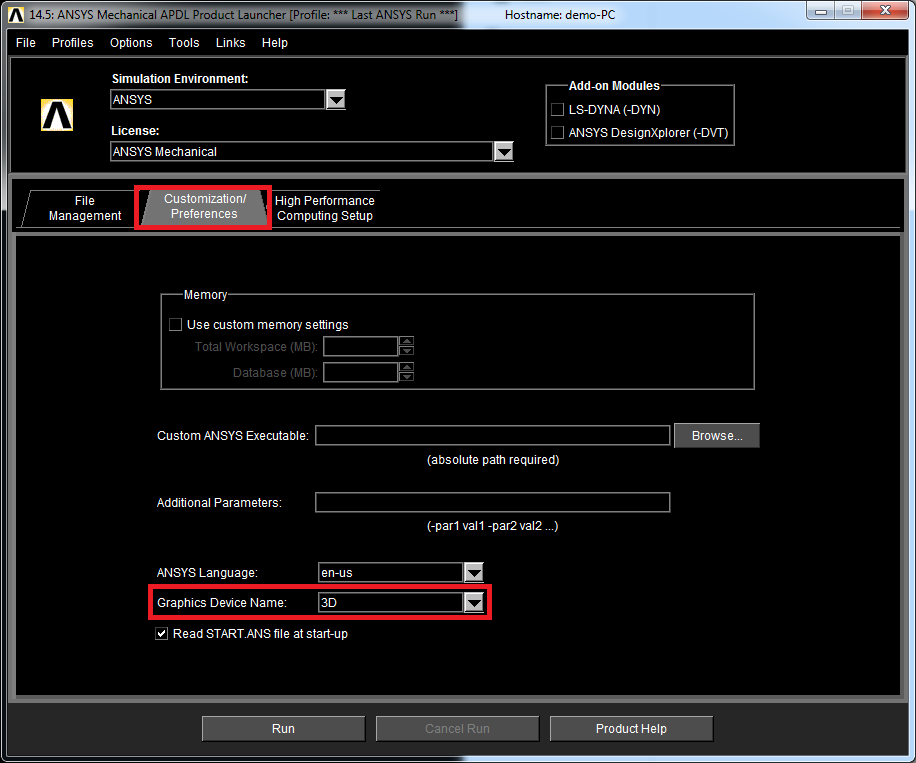
9) Start the Ansys Product Launcher. In the “Customization / Preferences” tab you will find the option “Graphics Device Name”. Please set it to “3D”. Then launch Ansys.
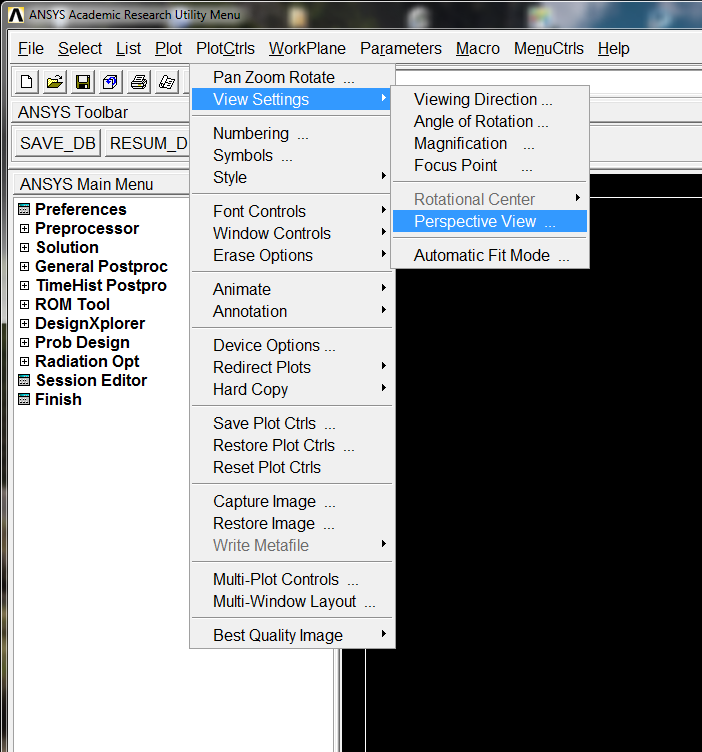
10) After loading a file, please click on “PlotCtrls” in the menu bar, select “View Settings” and finally activate the “Perspective View” option.
11) Press NUM* while rotating the scene/model to display in the in-app 3D-Stereo control panel to finetune the 3D effect according to your preference.
Are you not sure how to create a good 3D effect? Find out how in this tutorial video (6 minutes)
Do not hesitate to contact us for technical assistance: support@more3d.com
moreStereo3D provides 3D Stereo for glasses-free 3D displays, 3D Monitors, 3D TVs and 3D Projectors from within your application.
moreStereo3D works with many OpenGL based applications, it supports Side By Side, Top Bottom, Frame Sequential and Quad Buffered 3D Stereo output (any many more).
See our Youtube Channel for the latest tutorials and how-to’s.
See our FAQ for frequently asked questions.
Do not hesitate to contact us for technical support via the contact form or email: support@more3d.com